Most all of us have one of them. You know, the little bag hanging from the bottom of your saddle. Strapped so eloquently to your seat rails and post. Some have your favorite bike shop’s logo, some are blank, some are slim, and some are fat. It is 100% up to you and what you need for your rides. Some of us even have multiples bags for different adventures. 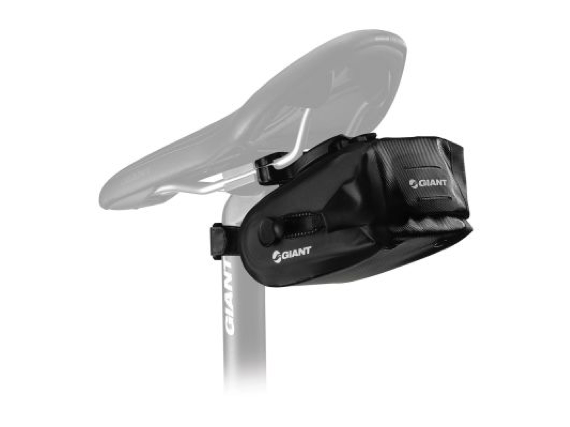
I get asked a lot “What should I carry?” and while my answer is somewhat generic, it is always 100% based on the type of riding and how comfortable the rider is with repairing their own flat tire or small mechanical issue. What size bag you need or prefer will be solely based on your needs as a rider and what you plan to carry. Plus, what you are ok with leaving at home.
First let’s fill a basic seat bag.
- Bag. The seat bag should be able to close and suck up tight along the bottom of your saddle. We don’t want a saggy bag that waves back and forth while you’re riding: keep it tight! There are many types; some have Velcro straps, some have buckles, some have a clipping mechanism. No matter which one you have, make sure you’re are comfortable with the looks and feel of it on your bike. If you don’t currently mount your tail light to the seat post, make sure that the new bag you get has a place to mount a light to it.
- Spare tube. This is a non-negotiable item if you are on a group ride, or any ride for that matter. You should always have a tube in your bag. Make sure the tube is the right size and make sure you either have a long enough valve or some valve extenders for deeper section wheels. **Pro Tip: Keep your spare tube in a small Ziploc bag and add some baby powder to it, this will allow for easy installation on the side of the road/trail and will protect the tube from punctures inside of the seat bag.
- Tire Levers. Some tire/rim combinations are a bit tough to get on and off the rim and require a little “leverage” from the levers in your bag. These handy little tools will assist you in removing the tire from the rim and can also help you to install the tire back onto the rim. These really shine on the last section of tire that wants to be stubborn.
- Patch kit. The old fashioned tried and true glue patch kit. These little guys are cheap and reliable. They take just a few seconds longer than the pre-glued patch kits but are a more permanent and effective solution. Yes, these are the same ones that you used when you were a kid.
- Inflator. Here is where variety and preference will come into play. While compressed air or Co2 is the easiest away to inflate your tube on the side of the road, the air will leak out much faster than using a hand pump. If you are ok with carrying a mini frame pump, these will keep air in the tires for much longer. However, they will not get you off the side of the road as fast. If you do buy one and plan to use it for a road bike, make sure it’s a “High Pressure” )not “High Volume” models as those are for gravel/mountain bikes). There are also many different styles of co2 inflator heads out there: some push and engage others you must twist. Make sure you know how to use the head before needing to use it. Keep two 16-gram co2’s in your bag at all times for a road bike: you’ll thank me later.
- Tire boot. Park tool makes a great tire boot kit that has an adhesive back and if used for a road bike you can turn a 3 pack into a pack of 6 very easily by cutting the big boots in half. These are far better than a dollar or a GU wrapper since the will hold the rip of tire together instead of just blocking the hole.
- Multi Tool. Small and compact for the road bike is recommended. The basic multi tool should have a 3mm, 4mm, 5mm, 6mm, Phillips/Flat screwdriver, T25 Torx head and maybe one other item.
 Multi tools can come in many other combinations, such as having a chain breaker tool, co2 inflator head, tire lever, disc truing tool and other items. It’s all about how you feel about working on your own bike. If you want an excellent all around multi tool, I recommend the Blackburn Tradesman.
These are the basic items and anything else from here would be a personalization to your own bag. Keep in mind that routine maintenance on your bike (adding sealant to the tubes, changing worn parts and tires regularly) will keep that bag in its place and hopefully will never need to be used.
Some people will carry many other different items, such as latex gloves, folded up toilet paper, copy of license and insurance card. Whatever you decide to add to your own bag, make sure that it has a purpose and you are comfortable with using it. Don’t be the person who doesn’t have the stuff to fix their own flat, make sure your bag is always stocked and ready to go.
Let’s go over some items you may want to carry if you do different types of riding. 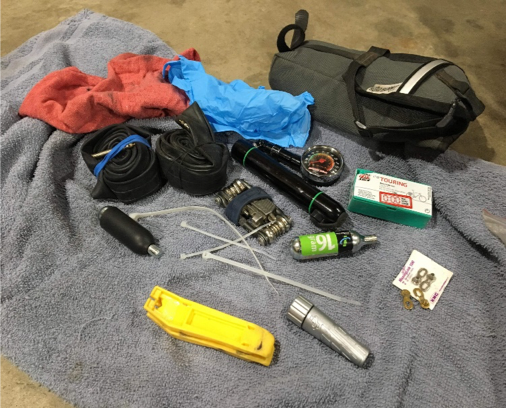
For example, a Gravel/Cyclocross or Mountain seat bag might include:
- Tubeless Tire Repair Kit. Great for patching up tears in the sidewall or tread of the tire without having to install a tube. Typically, these will come in the form of “Plugs” that are meant to get you home. You’ll want to head to your local bike shop to get a new tire after using one.
- Chain Breaker. This tool will push the pins out from the center of the chain and will allow you to mend a broken chain or help with preparing the chain to install a chain master link.
- Chain Master Link. The unsung hero of the seat bag, this part will reconnect the chain after it has broken. The great thing about the master link is that there are no tools required for installation.
- Tire Pressure Gauge. Whether you are into the digital gauges or old school analog, either way it’s a great idea to keep one on hand always while riding off road or on mixed terrains. The point of carrying the gauge is that it takes the guess work out of what your air pressure is, and allows you to finely adjust it to your riding style and weight. **Pro Tip: Buy a small frame pump or a mini pump that has a gauge on it. Lezyne offers a great solution for this in a High-Volume pump.
- Zip Ties and Duct Tape. Does this really need an explanation? Keep a few of these handy for the situation that I hope you never find yourself in.
No seat bags were harmed in the writing of this blog. However, Mr. Henry Pretzer had to put everything back into his bag after graciously taking a photo of his personal gravel seat bag. Kuddos to Henry for rocking the Road Runner seat bag. Road Runner bags are made in Los Angeles, and do a fantastic job.